|
|
|
|
So you wanna restore your slighty ding'd up ped, or just want a fresh color...well,
get ready to get dirty, dusty and test your patience.
If you've never taken your ped apart, get a manual as it will have
dissassembly steps. Or take off what you can, and ask Smitty (here) if you get stuck. Put fastners in zip lock bags and label
them, try keep each bag limited to a specific part (like fork stuff only etc...) Stuff like engine bolts can be loosely screwed
back into the motor once out. Parts with nuts and bolts, screw 'em back on to the part once removed. I keep a lot of beer/soda
boxes around when doing R/R stuff to keep organized as possible.
Once all the parts are off, you'll want to clean off
any grease/oil. I use lacquer thinner a LOT so I wear gloves. Any solvent will work, after the heavy stuff is gone, hot water
and DAWN dish soap with a rag will remove any wax and residue. I use compressed air to 'blow-dry' and let it 'bake' in the
hot sun to remove any water traces.
Here's where you can decide if doing a total strip or 'scuff sand'. Before I forget,
NOW is the time to take any parts to the chrome shop or powder coaters for estimates, expect that kind of metal work to take
a while...good since you'll be painting your ped anyway.
OK, if you have very minor or no rust, it's fine to use the factory
(make sure it's not a cheesy repaint) paint as your 'base'. 3M has these real nice foam pads (thick and thin) that has sandpaper
grit on both faces, perfect for all those indents and curves. 320 is good for scuff sanding. 2 thin pads and one thick block
should be fine. ALL the paint MUST be evenly dull. Blow the dust off and use a wax/grease cleaner such as NAPAs Kleeneze or
similar cleaner/solvent to remove trace dust and oils. Next, lightly wipe with a tack rag (found at any hardware or paint
shop)...lightly dust with the rag, rub hard and you'll get smeary goo on. Some painters let the rag 'breathe a few hours before
use so it's not too sticky.
You are now ready for primer. Make sure the primer (rattle can is fine) is good for lacquer
or enamel.
OK, for those who wanna strip ALL the paint off for a total resto, get ready for a lot of work. You can sand
(machine or hand) or use a chemical stripper. OR, if you wanna spend some bones, find a sandblaster shop (Please note, what
I'm describling is for METAL frames only!) as they will do all the dirty work. Make sure you duct tape that gas cap and petcock
holes!
Chemical stripping requires a 'safe' drainage (no flow to open streams or oceans via storm drains) gloves, goggles,
putty knife and some stiff brushes. It's REAL messy, toxic and dangerous work, but if you wanna do it, the 'aircraft stripper'
works best on factory poly.
I used a 3M paint and rust remover wheel on my Puch, it's a semi-rigid wheel (maroon) and
NOT the rock hard grey or black one. Put it on my drill and it took off the paint easily, it's meant to break down and not
remove metal so expect to buy 2 as the wheel will get small. Wear a dust mask, old paint stinks and is'nt good to get into
your lungs. I also used similar small wheels on my Dremel, those break down FAST. I like how the paint came off and revealed
the bright shiney metal when using the wheel. I did dab some stripper in the tight nooks by the head tube.
IF you bare
meatl, you'll need to do an etching wash (messy) or use self etching primer. NAPA makes this in a rattle can, I used it on
my Maxi...good stuff. This is for BARE metal only.
Primer in spray bomb is usually kinda smooth, the high-solids primer
(spray gun) hides a LOT of flaws, but will require sanding with 400 after a few days drying time. Let your primer dry a day
or longer...NEVER spray anything containing silicone (like ArmourALL) in the same room you paint in...like me who uses my
garage, LOL
Color. IMO, spray cans is OK, but won't hold up like the automotive paints will, that's why the factories
use it. If you are going for a low budget 'color-change' and don't wanna mess with clears, go enamel. Build up coats slowly,
wait 5 minutes between coats, get about 7 coats at least (that's 35 minutes total wait time between coats...patience!). Final
coat can be heavy (wet) but use finesse or risk a fatal RUN. Enamel takes weeks to cure, expect to hang up a while, let dry
in a safe well ventialted area. DON'T touch it...so many people like to touch wet paint...it's really wierd...and SICK, LOL
Lacuqer is the easiest and most forgiving to spray. Dries fast and if you run it, let dry, sand and shoot over. All my
Schwinn and most guitar repaints used acrylic lacquer kandy as the color coat. I used auto poly as my clears though. You CAN
get a killer deep gloss with spray can clear gloss lacquer, but it will take a LOT of clear coats, some inter-coat sanding
and high speed buffing, but it CAN be done with patience. BUT lacquer still is'nt as strong as poly, and any gas spill may
haze it, but you can rebuff it.
OK, I'll walk ya through my Maxi repaint with some pics from my album...
Sorry, I
already bare sanded the frame and have a nice coat of self etching primer on. I used the House of Kolor grey 'base' sealer
in this pic.
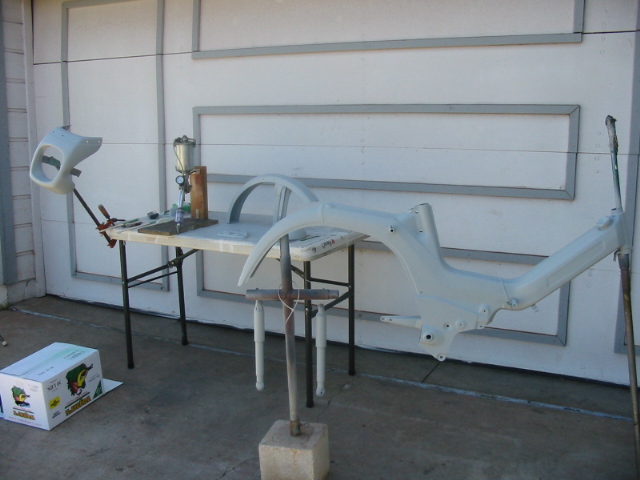
You'll need to fab a 'jig' to hold the frame and various parts. I did'nt do one for my front fender and it fell after
the color coat, I ended up going to a chrome fender and it's even kooler...
IF you want a pro repaint, use a 'sealer'
over your primer as the color goes on the sealer while it's still 'soft' creating a mechanical and chemical bond between primer
and color. You'll need spray gear to shoot sealer, I have'nt found it in rattle can, but someone may make one. I like to use
red oxide sealer in my Schwinn repaints, the original factory did as it's easy to miss spots shooting the silver kandy base
over a grey primer. Sealer is NOT necessary, but a wise choice if you're anal about having a quality paint job.
I had
planned to do an old school metalflake, but the HOK Shimrin Green was not a kandy as I had hoped, still, the color was too
kool not to use, glad I did. I may flake my helmet, so I'll show you guys how later.
Squirting the kolor on...
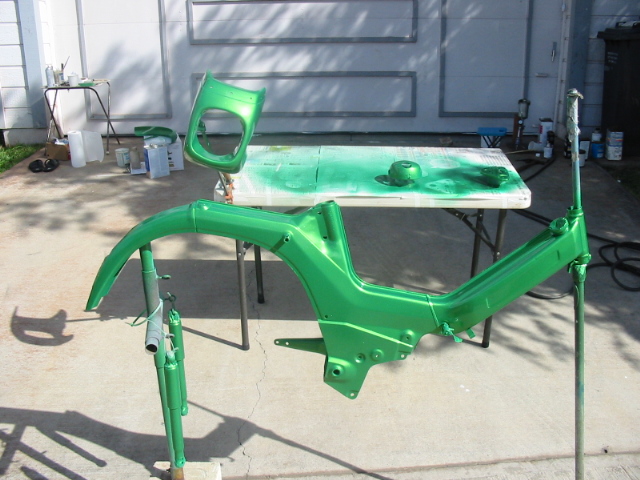
This HOK Lime Time Green went on 'egg shell' with a ton of gold pearl in it...sweet. Kandy lacquers will go on dry and
dull...waiting for the clear to hit it and BAM!
Because I had put this project on hold over 10 years, the HOK clear had
gone bad, so I used Dupont urethane clear. It's the 'Hyper'Cure' 2 part catalyzed stuff so it dries hard in an hour. You'll
need a GOOD respirator even while mixing...clears are very toxic, use caution. Use a mask for ANY paint guys, my lungs are
messed up from all the years of spray bombing without a mask...never bothered me, now any wiff of spray paint gives me major
chest pains, I even wear a mask when using thinner to clean up. Here's the first clear on...
I let this dry a few days, and wet sand with 800. I use a few drops of dish soap in the water bucket so the paper won't
'stick' when sanding...also let your sandpapers soak an hour or longer to soften it up. I want a deep gloss so another few
coats will go on...
At this point, if your final clear was nice and 'wet', you can call it done and assemble, that's what
most factories do. They have great spray booths so no dust or bugs stuck in the clear, us outdoor shooters have to deal with
it.
Auto poly can be sanded and buffed to look like glass. I do it, start with 1200, 1500, 2000 grit WET. I 'cross-sand'
grits so i make sure I remove the previous grit scratches. You'll need buffing gear, there is a LOT of compounds and polishes
out there, I favor this European system using polishing rouge blocks and flannel disc wheel. I ordered it years ago in my
furniture refnish biz from the guys who supply the polyester to Rolls Royce for their Buryl wood trim. Good stuff, but there
are many other buffing systems out there to use after you have it sanded up to 2000. Buffing done...
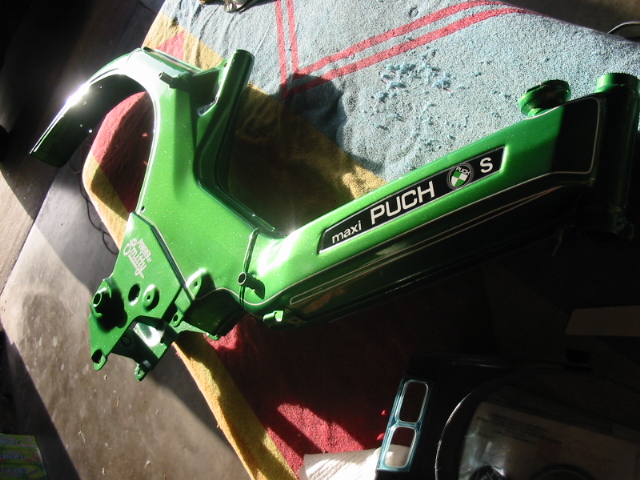
That's it...assemble and enjoy!  More tips and stuff later, feel free to ask any questions, I've used a lot of different products and methods, and hope I
can help you get your peds lookin' sweet. More tips and stuff later, feel free to ask any questions, I've used a lot of different products and methods, and hope I
can help you get your peds lookin' sweet.
Final look:
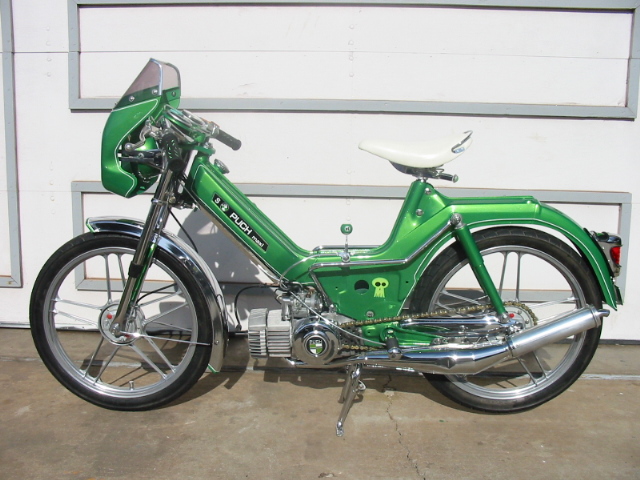
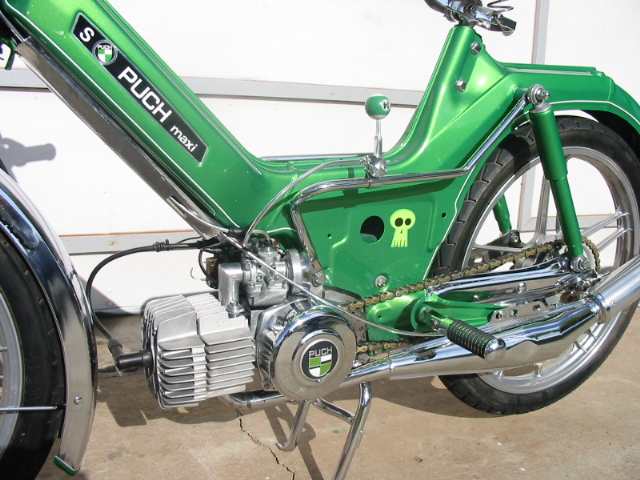
Look closely under the skull, the reflection of the foot peg shows the deep wet shine buffing your clear will give:
_________________
Freakin' sweet!
Last edited by butnut on 05 Sep 2006 02:31 am;
edited 1 time in total
| |
|
|
 |
Painting graphics |
 |
 Posted: 23 Jun 2005 04:36 am Posted: 23 Jun 2005 04:36 am |
| |
| Message |
|
|
|
I make simple graphics, I'm no artiste, so I try to KISS (Keep it simple stu...)  like comp stripes and flames. like comp stripes and flames.
It's best to draw it out on paper so you have some idea of proportion and flow. 3M Blue
FineLine tape is the BEST for stripe and graphic layout IMO. I use the 1/8" and 1/4". 'Filler' tape must be the 3M blue painters
mask or green lacquer masking tapes as you're taping fresh paint and don't want tape goo on there.
I'll show some guitars
as well as my helmet, but these techniques can be used on yer peds of course!
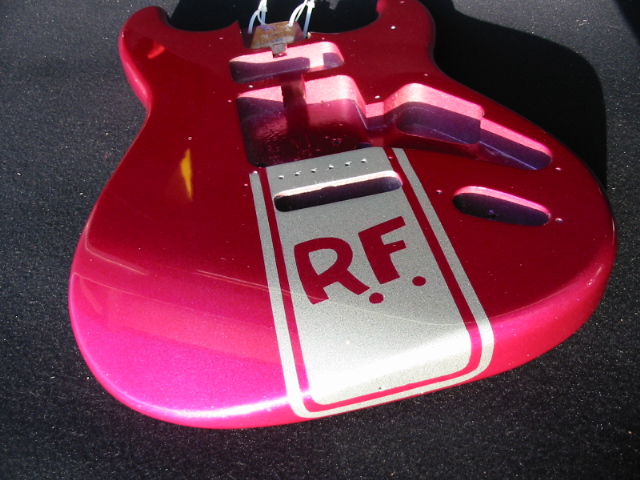
Primer is done. Simple way for 2 tone. Spray
silver base, dry, spray silver flakes, dry, tape pattern, shoot kandy over, pull tape to reveal silver graphics, shoot clear...sand
& buff.
Fender Strat body: Kandy Violet over silver flakes using tape method.
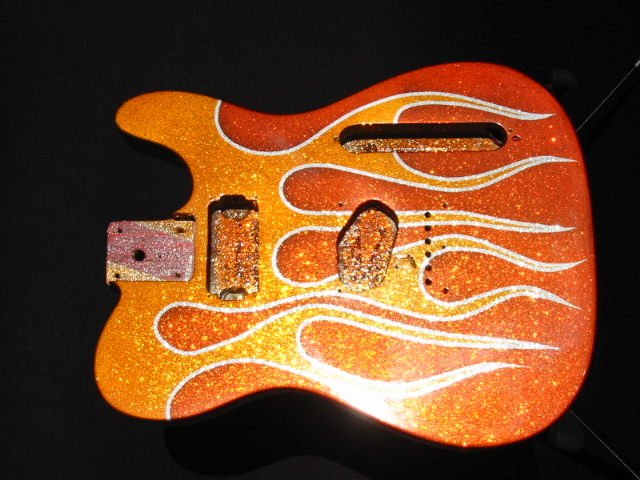
If you want to add a second color, it will take more masking and taping. Spray silver base, dry, tape pattern and MASK
(in this case flames) I used the 1/8" tape for a 'border' of silver. Shoot color (Kandy Red) & dry. Pull masking (leave
1/8" if want border) and now mask Red area. Shoot color on flames (Kandy orange) and highlight tips with airbrush if wanted.
Pull masking (I made a few drop shadows) and shoot clear, sand & buff.
Fender Tele body: Kandy Red and Orange over
silver flakes using tape and double mask method.
For my helmet, I wanted to use HOK Shimrin (like my Puch) AND kandy lacquer. I was'nt 100% sure of compatibility so I
painted and masked the different sections as I went along...PITA!
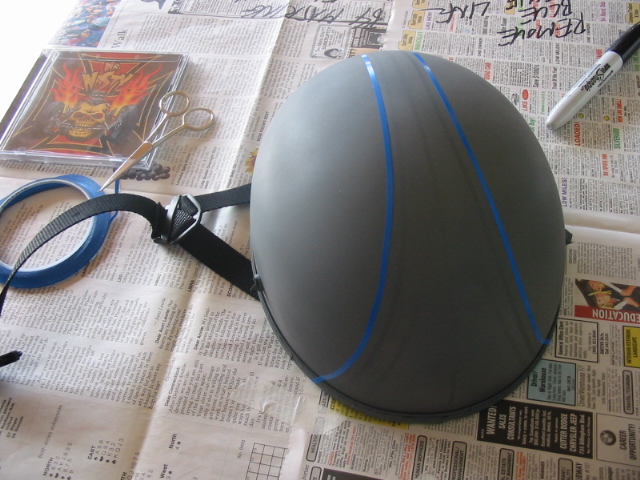
Masking the main graphic (flared comp stripe):
Sides masked, silver base shot:
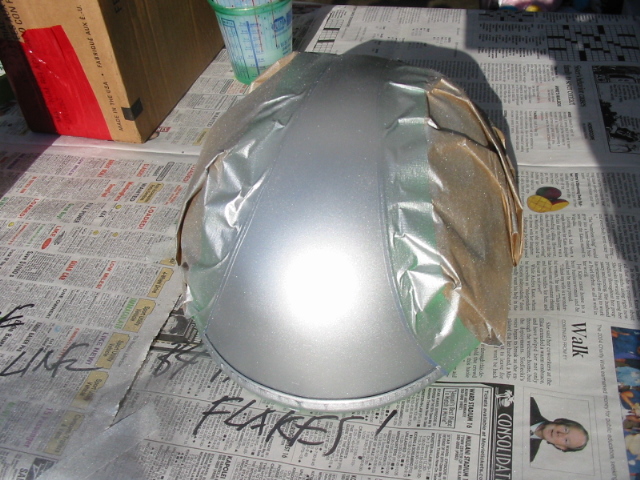
Silver flakes shot and inner comp stripes added with tape:

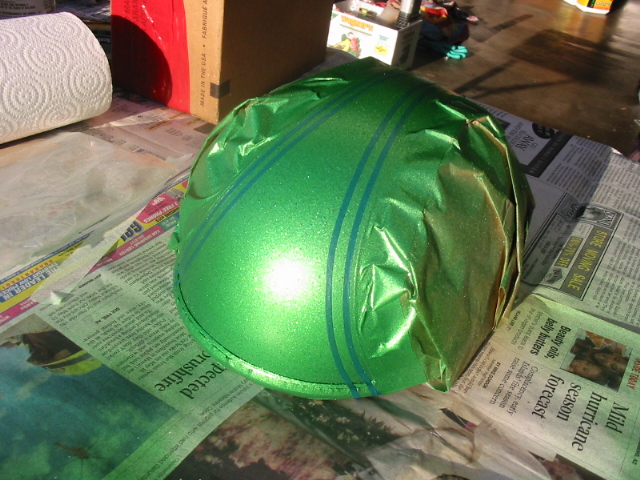
Kandy Green shot over silver flakes:
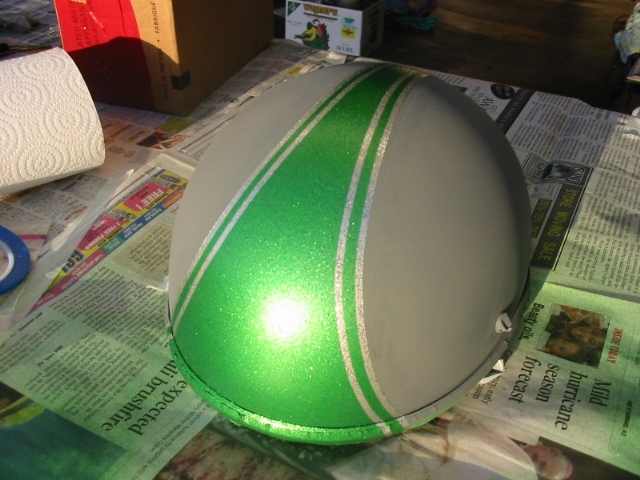
Tape pulled to reveal finished Kandy Green stripe graphic:
Now very carefully mask the graphic to paint the sides:
Because I'm using HOK Shimrin, I need to spray their grey sealer on my primer:

Shimrin Lime Green on:

Masking pulled, always pull the tape sharply for clean edges:
ALL masking removed as paint buildup is getting thick. I'll retape for final clear:
Final clear sprayed, not gonna buff, shiney enough...LOL, gotta have that skull.
I dig those Puch pins I get from ebay...stick 'em everywhere...

_________________
Freakin' sweet!
| |
|
| |
|
Simple color change |
|
| Posted: 26 Jun 2005 04:56 pm |
| |
|
|
|
|
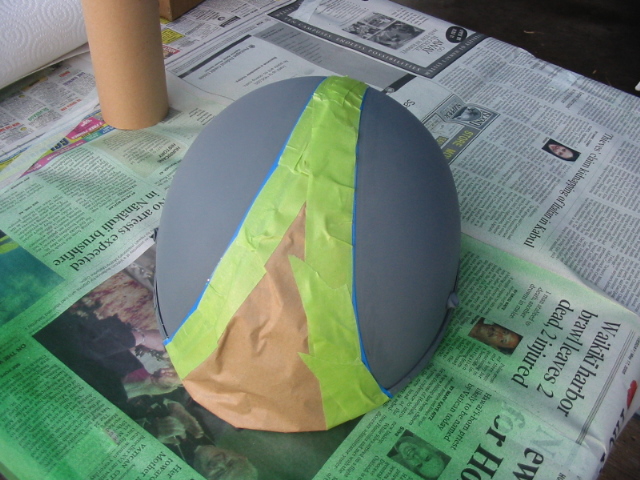
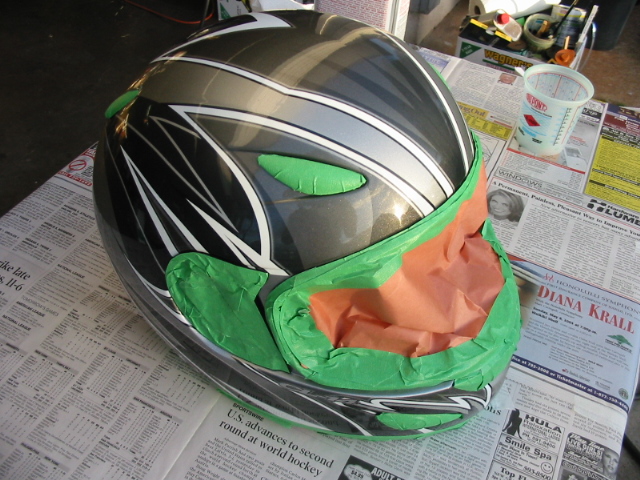
Scored a new helmet for a great price...but not 'my' color. I scuffed the shiney surface
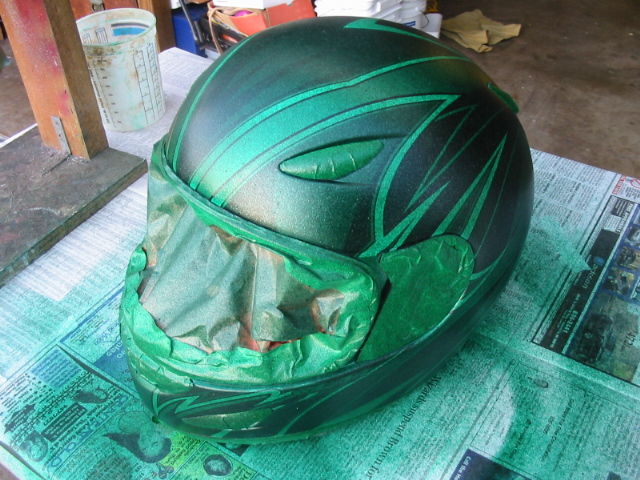
with a ScotchBrite pad to evenly dull it. Wiped it clean and shot a kandy emerald green lacquer. I used kandy as it's transparent
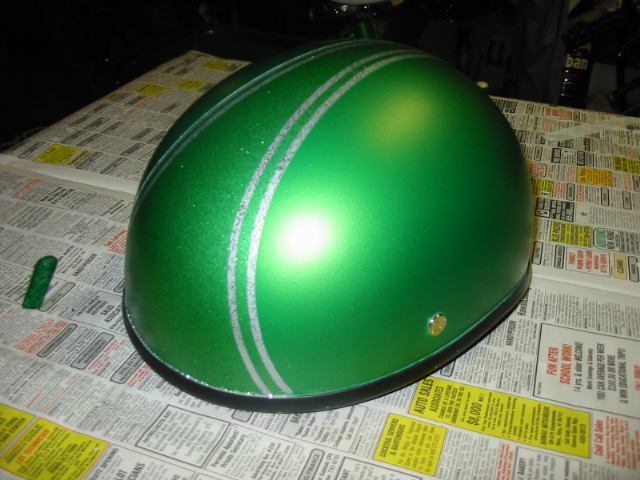
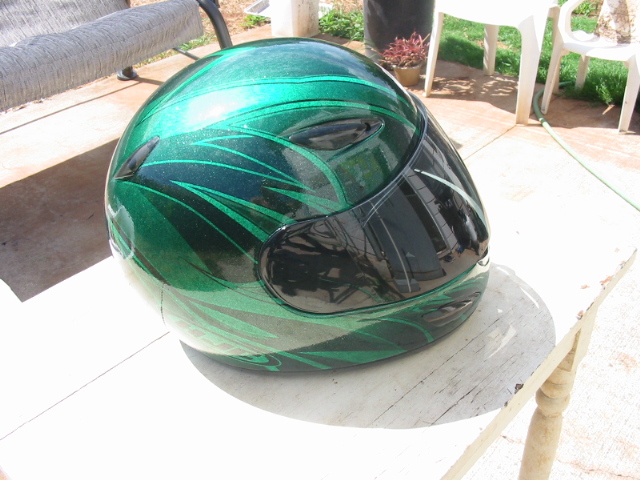
and will show the graphics which were kinda kool. I threw in some mini flakes for giggles.  Shot the clear (added some pearl) and it's Morphin Time!...I love the Green Ranger! Daa, da daa dadadaaaaaaaaaaaaa! Shot the clear (added some pearl) and it's Morphin Time!...I love the Green Ranger! Daa, da daa dadadaaaaaaaaaaaaa!
Taping's a biatch!
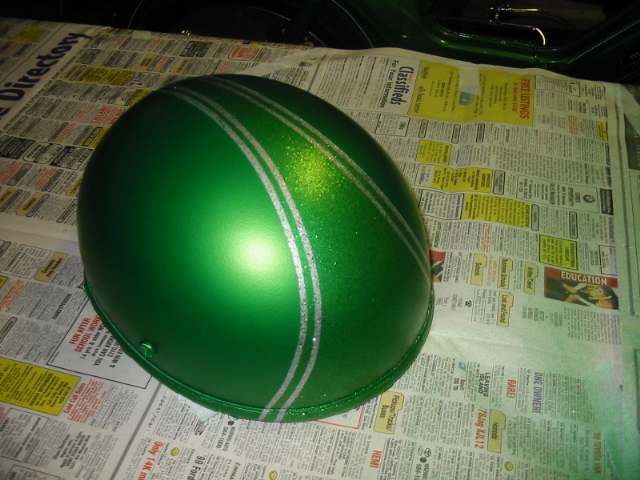
Kandy green ON!
Clearcoat ON! Go Go Power Rangers!
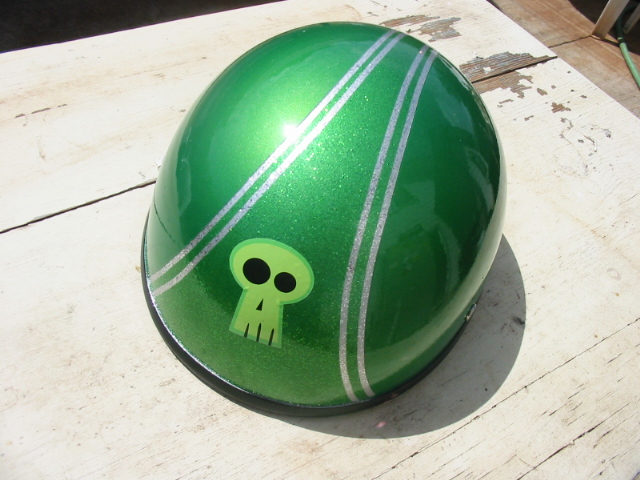
I've been fooling around with pinstriping...used One Shot green here. Started by following a few of the graphics for
the border, and went wild from there...
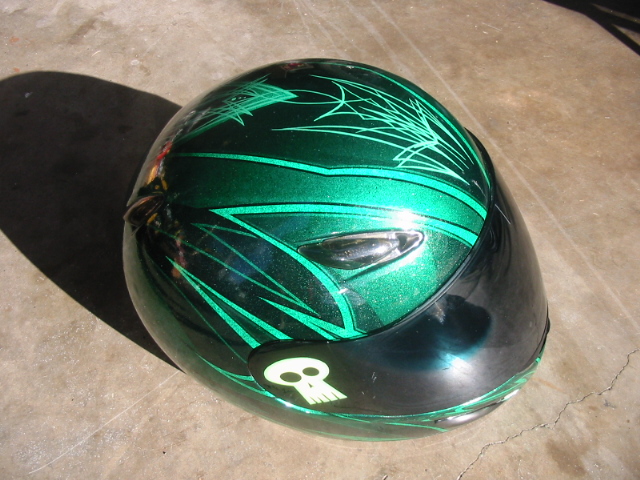
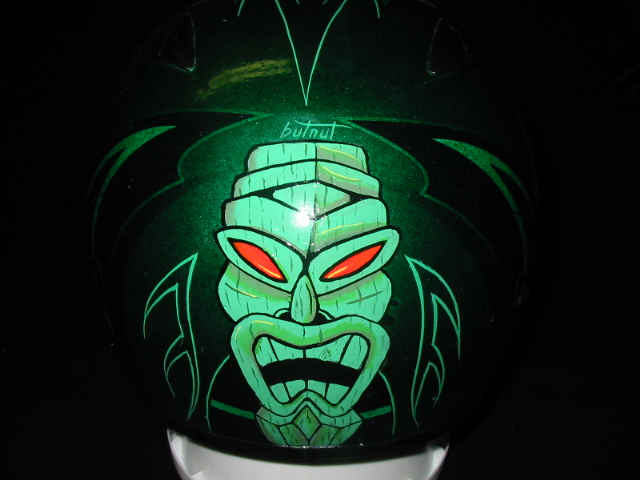
Since joining the pinstripe forum, I got some great ideas for hand painting using One Shot paint. I love Tiki's, so I
did one for my helmet...
_________________
Freakin' sweet!
Last edited by butnut on 01 Nov 2005 04:23 am;
edited 1 time in total
| |
|
| |
|
Puch80 Magnum kustom
paint |
|
| Posted: 26 Sep 2005 05:49 am |
| |
|
|
|
|
I did the kustom paint on the Puch80 Magnum project. So instead of me typing for days, I'll post the link to the album
page...most pics have captions with what I'm doing. There's 2 pages of pics...now go paint yer peds!
http://www.lilypix.com/photos/showalbum.php?sf=1&uuid=729&aid=3688
Finished pic of the most controversial moped on the planet earth!  hehe...for ALL those with their hearts in the right place....THIS ONE'S FOR YOU BRUDDAH PAUL. hehe...for ALL those with their hearts in the right place....THIS ONE'S FOR YOU BRUDDAH PAUL.
_________________
Freakin' sweet!
Last edited by butnut on 14 Sep 2007 02:58 am;
edited 1 time in total
| |
|
| |
|
2 Tone Maxi repaint |
|
| Posted: 14 Sep 2007 02:49 am |
| |
|
|
|
|
Wow...been awhile. Here's a few shots that show how I did my 2 tone Maxi II repaint.
Similar to my single color, just more masking and a good eye to create a pleasing paint scheme to make that 2nd color look
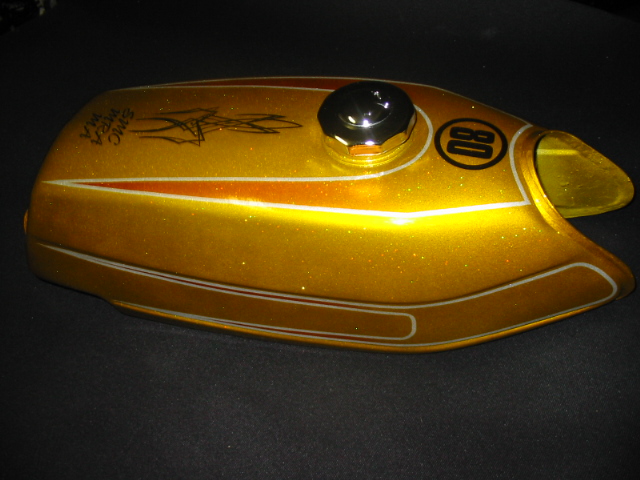
sharp. I use 1/8" masking tape to lay out my designs, that tank took 4 tries until I nailed the perfect shape...there are
no hard lines on the tank to follow so it's up to you to make something that works. The tail light has the vintage style 'point
as does the headlight, the fender tips were easy, just kinda follow the factory 'lips'. I do freehand pins BUT I know what
works for the best finished look...yeah, I knda 'cheat' as I used 3M 1/8" black pinstripe tape to outline the white...still,
it will take a steady hand to lay the super thin tape straight! I shoot my clear urethane over the tape to seal it in and
give a nice smooth look. I used PPG lacquer, and selected a vintage VW puke green and vanilla....looks killer and is a nod
towards the Puchs Euro roots. It's a solid color, non metallic, but you know me....I gotta have something kool so I put a
small amount of green and frosty pearl dust into the clear...on a hot sunny Hawaiian day, it glows very subtly and gives that
'kustom' paint shimmer. I always sand and buff to a mirror gloss with gloss urethane, BUT as I looked at the paint scheme,
it just reminded me so much of my moms old enamel stove, a slight orange peel look still glossy. So I left it as is....it's
freakin' KOOL! Gave the Maxi a real vintage look which is what I was going for, I did'nt wanna dump money into a ton of chrome
like my other Maxi I so a lot of parts were sanded/scuffed and got several coats of epoxy black...one of the few rattle can
sprays I like to use for small painting, it's durable, takes a week to really cure and looks great.
I stripped to bare
metal (again) as it had at least 7 layers of old spray paint. Some pitting, so after primer (this will show EVERY flaw, I
skimmed a few dents and pits with catalyzed Bondo and glazing finish putty. Always block sand, I use a wood and rubber block.
Once your color is on. take the 1/8" masking (3M blue fineline) and create your contrast 'panel. I use 3M green lacquer masking
tape to cover the blue masking and use real masking paper...newspaper can 'bleed'. Once the exposed panels are taped, I scuff
with a ScotchBrite pad to slightly dull the base and give the 2nd color some bite... I use the cheap tan tape for wrapping
the mask paper. I pull my tape after 10-15 minutes with lacquer, lay down the black pinstripe tape and get ready to clear.
This frame was especially fun as I molded in a 'Punisher' belt buckle to hide the old airbox hole and I recessed a Harley
'cat-eye' tail light into the fender, it's a horizontal light with a clear lense on the bottom so mounting sideways I had
to epoxy the lense on and Bondo the lense smooth. I used a 2 part epoxy putty to mold both pieces onto the frame, a light
skim of Bondo and glazing putty smooths it out. I use a high solids primer for these add-ons and self-etching primer for the
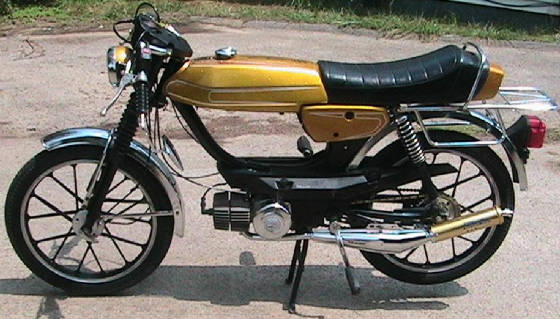
main frame as it was bare metal. The finished bike surpassed my original 'vision' I had of how it was going to look...vintage
racing koolness...have fun painting....and WEAR YOUR DAMN MASK! hehe
Primer on:

Color on:

Masking the tank insert:

Shooting the vanilla:

Masking pulled:

Pins on and cleared:

Assembled and ready to roll:


_________________
Freakin' sweet! | | |
|